Published at Aug 12, 2026
 Jakub Mrocek
  Filip Mrocek
 PIR Detection Zones: Aim Your Trail Camera to Trigger in Time
If you have used trail cameras for any length of time, you know the moment: the video starts just as the animal is leaving the frame. You shake your head, wondering what happened in front of the camera and why it did not react sooner.
Usually, the camera is not at fault. The sensor is not defective, the processor is not slow, and the settings are not wrong. Most often, it is simply a consequence of how PIR detection zones actually work and how different their behavior is from what we intuitively expect from a trail camera.
This is the key to better footage. Once you know exactly where your camera “sees motion” and which areas are effectively blind, you can position it better in the field. False triggers decrease, and you capture more of the footage you carry a trail camera into the woods for.
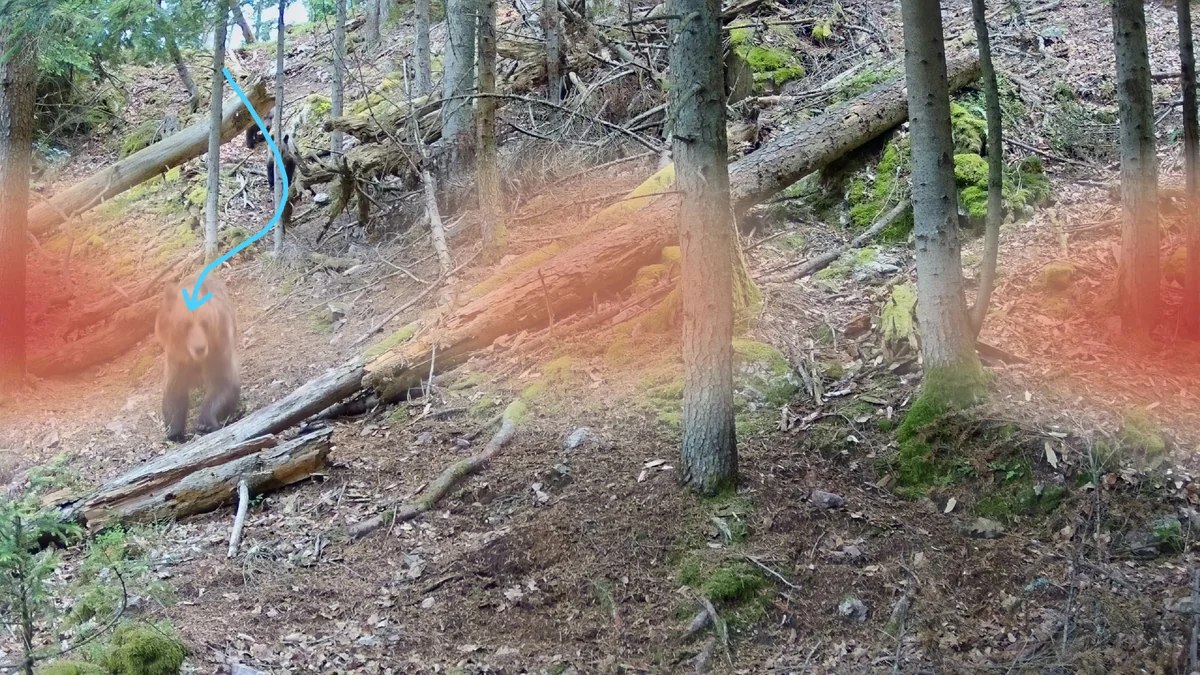
Here is what that looks like in practice. A female bear with two cubs ran down the slope through the upper part of the frame, where she had already been for several seconds before recording began. The camera reacted only when she reached the red zone. Why? That is exactly what this article explains.
In this article, you will learn:
- how a PIR sensor works and what it actually detects,
- what the Fresnel lens on the front of the camera does,
- where the real trigger zones are, based on maps we reconstructed from over 1,600 field videos,
- how to position a trail camera so it reacts quickly and accurately,
- what worked for us in the field and what did not.
In a hurry? Skip straight to the placement rules. If you want to understand why they work, read from the beginning.
What a PIR sensor actually detects
A PIR (passive infrared) sensor emits nothing; it only receives. It picks up the thermal radiation emitted by every surface, including animals, the ground, tree trunks, and rocks.
The word “passive” matters, but what the sensor does with that radiation matters even more. PIR does not detect motion or heat itself. It detects a change in how radiation is distributed in front of the camera. Inside the sensor are two small elements that respond to thermal radiation and are wired against each other. A signal appears only when one receives more radiation and the other receives less. This happens, for example, when the warm body of an animal moves from one element’s field of view into the other’s. If the entire scene changes at once, such as when the sun comes out from behind a cloud, both elements receive equally more radiation and their signals cancel each other out.
Almost everything we observe in the field follows from this simple principle:
- An animal standing still in the frame will not trigger the camera.
- An animal moving through an area the sensor cannot “see” will not trigger it either.
- Air temperature is not what matters; surface contrast is. The animal does not even have to be warmer than its surroundings. A cooler body in front of a sun-baked rock also creates contrast and triggers the camera.
- No animal has to be present. When cold air blows into a warm scene, the elements register the change just as they would a moving warm body, and the camera triggers on an empty scene. We will return to false triggers later.
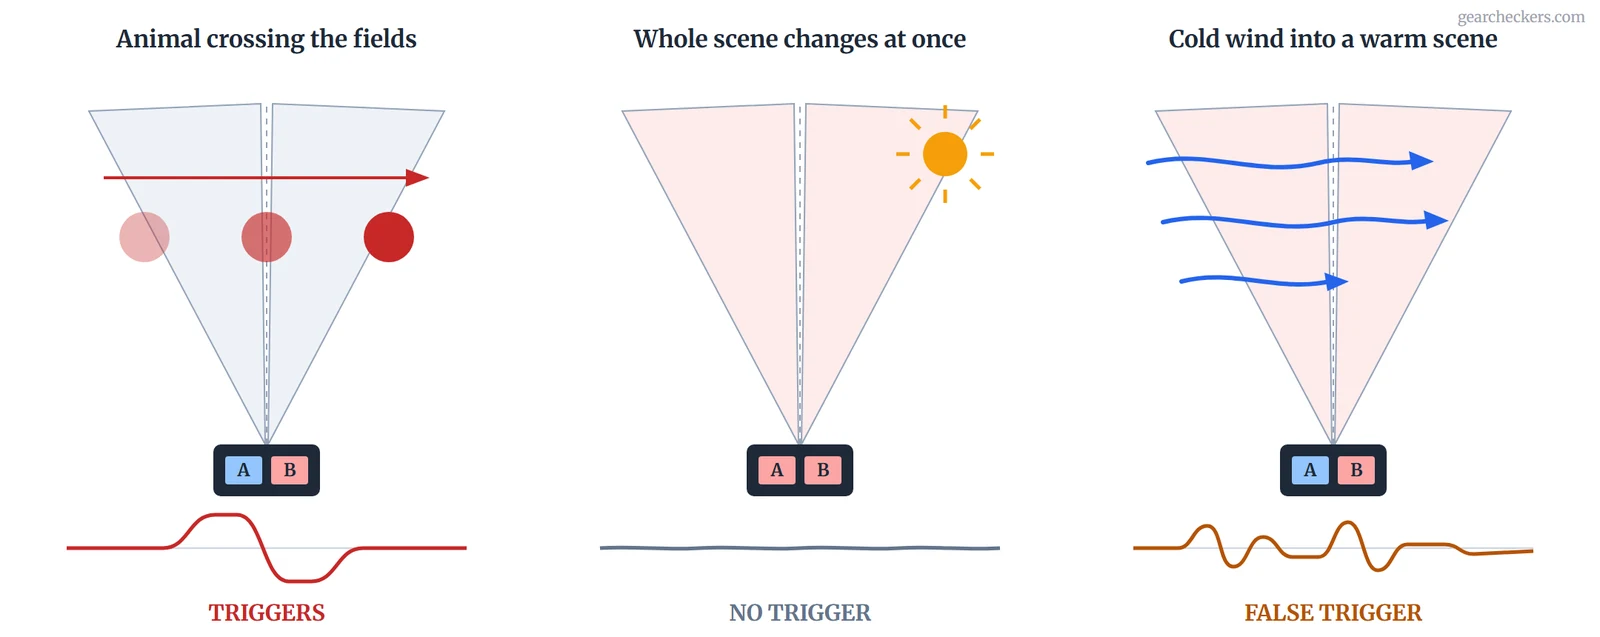
We covered the basic operating principle in How Does a Trail Camera Work? A Visual Explanation. Here, we look more closely at what the PIR principle means for camera placement.
The Fresnel lens: an unassuming piece of plastic that shapes the zones
That ridged plastic strip on the front of the camera is not a design feature. It is a Fresnel lens: an array of small lenses, each of which projects a different section of the scene onto the sensor.
Picture the result as the stripes on a zebra. The space in front of the camera is divided into sensitive bands separated by dead gaps. Recording starts when the animal’s thermal image crosses a boundary between them and creates the necessary contrast on the sensor. Movement that takes place entirely within one zone may not trigger the camera at all.
The lens design determines:
- the width of the detection field,
- the number, shape, and arrangement of the trigger zones,
- the detection range.
A small change in the design can mean the difference between a camera that reacts in time and one that starts recording only when the animal is already in the middle of the frame or leaving it.
This is the Fresnel lens viewed from inside a disassembled trail camera. Each ring is a separate lens. Each directs radiation from a different section of the scene onto the sensor, and together they create the zone pattern shown in the maps below.
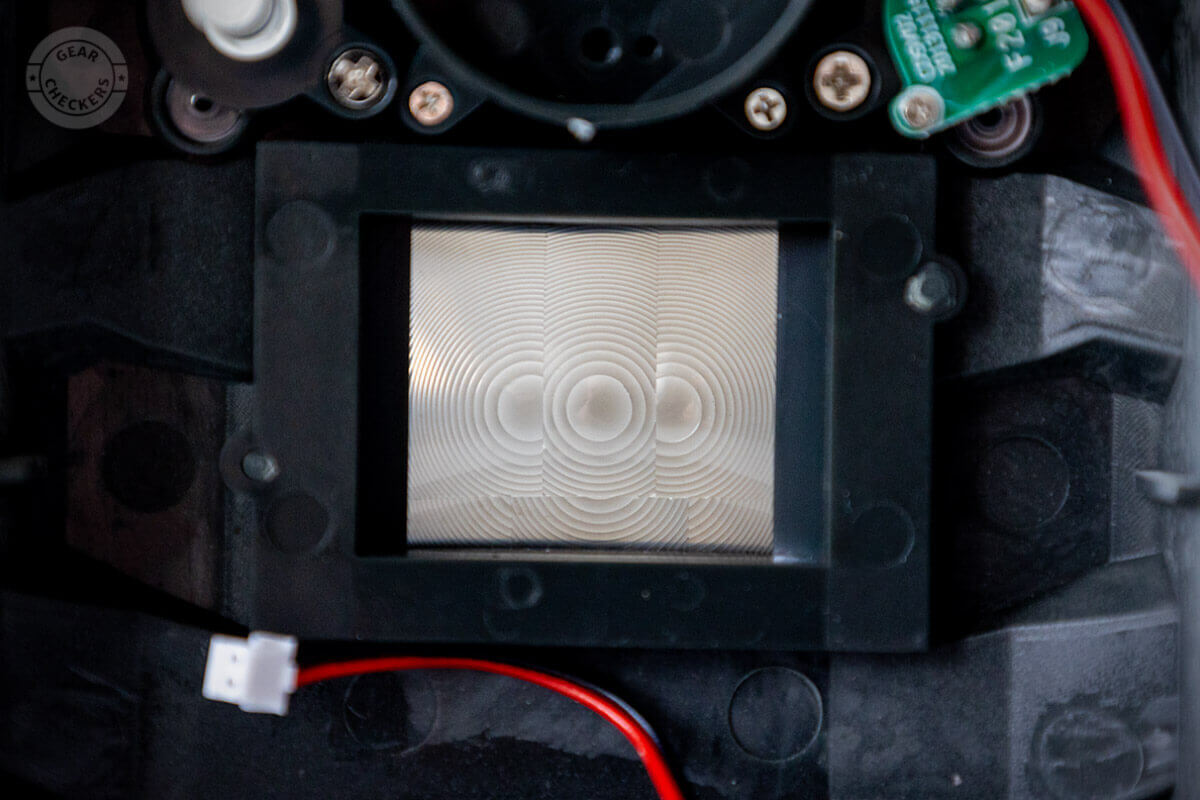
Every model has its own zone pattern. Manufacturers do not publish these patterns, so we measured them ourselves.
Where the camera really triggers: our field maps
You cannot determine the trigger zones from a photo or spec sheet. You can, however, reconstruct them from the first frames of videos in which the animal is already visible when the clip begins. In those clips, the animal most likely triggered the recording, so its position at the start of the video shows where the sensor reacted.
We processed 1,092 videos from nine units of the Browning HP5 Ultra and 522 videos from eight units of the Reconyx HyperFire 4K, all deployed in the Slovak Carpathians. We collected and processed the data using our own TENTAUR Sense software, which we will cover in more detail soon. We combined the left and right halves of the maps because, based on our experience disassembling trail cameras, PIR assemblies are built symmetrically.
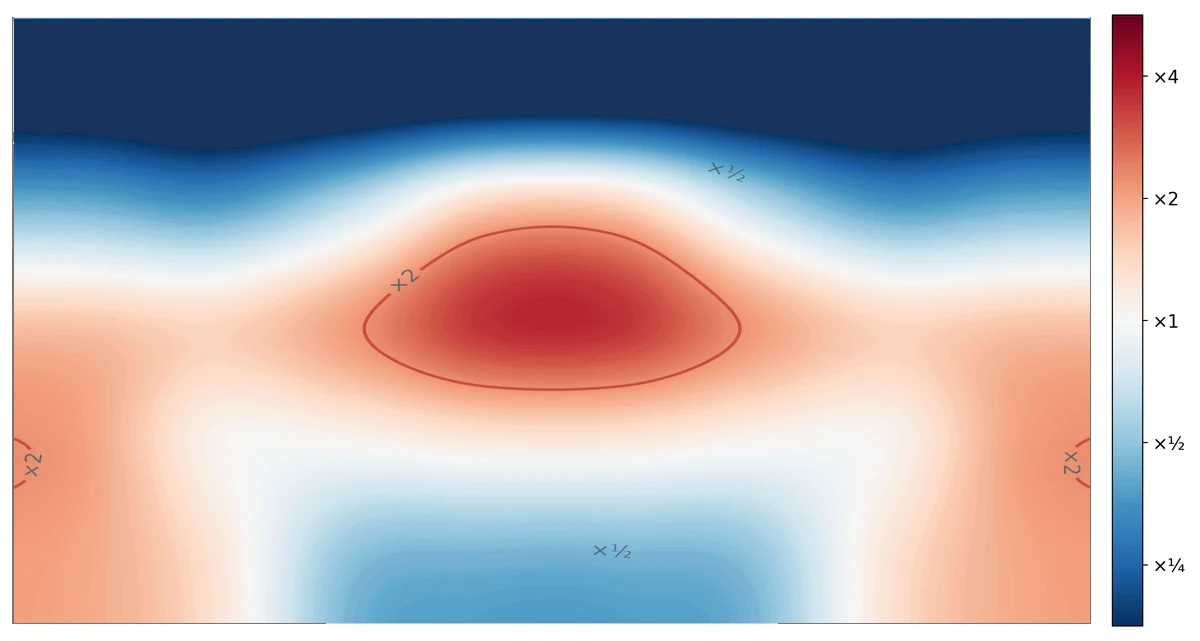
The maps revealed two very different patterns. Red marks areas that triggered more recordings than a uniform distribution would predict (×2 = twice as many), while blue marks areas that triggered fewer.
The Browning HP5 Ultra has three hotspots across the middle band of the frame: two side wings and one in the center. This matches its segmented Fresnel lens. Do not rely on the bands along the top and bottom edges of the frame.
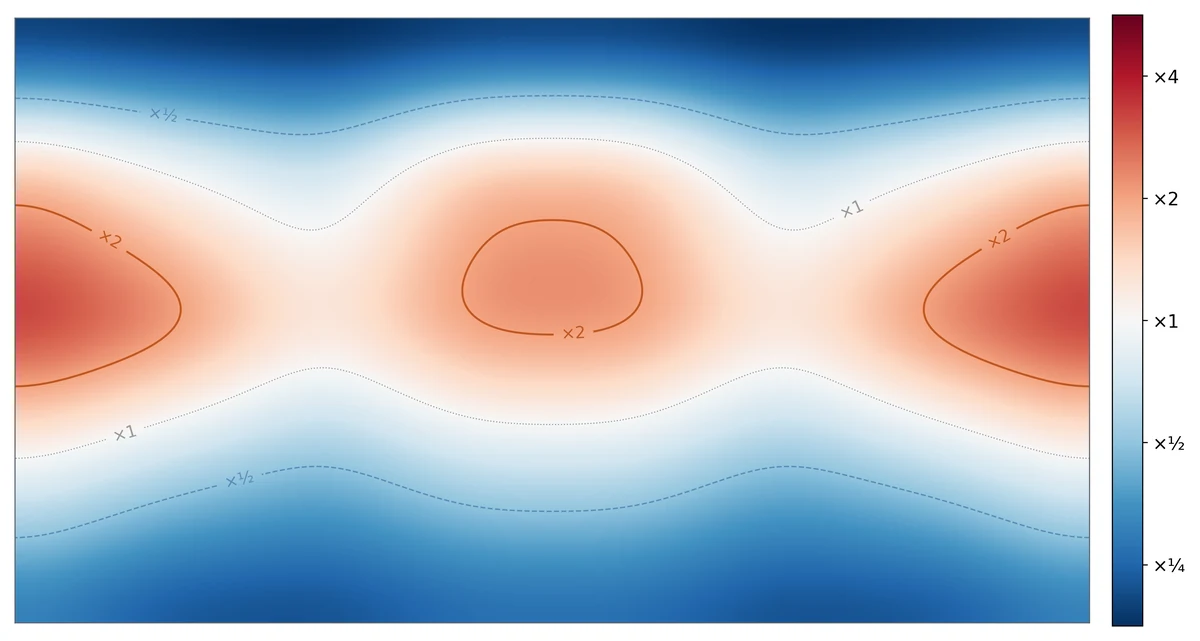
The Reconyx HyperFire 4K has one wide beam above the center of the frame and also triggers readily in the near bottom corners. It practically never triggers in the upper part of the frame. The Reconyx data is still preliminary and comes from a smaller sample, but the pattern is clear.
Neither pattern is wrong. They reflect two different design philosophies.
Reconyx is built for the longest possible deployment without human intervention: 12 batteries, optimized power consumption, no live preview on the display during setup to save energy, and support for cards up to 1 TB. The camera is designed to operate in the field for more than a year. Meeting that goal required limiting false triggers, which is exactly what the zone shape does. Detection is concentrated in the center of the frame, where you aim the most important part of the scene during setup, and responds less to trees and sunlight near the edges. In our test, the Reconyx produced just 12.3% false triggers, roughly half the HP5 Ultra’s rate and the best result we have ever recorded. The trade-off is that an animal entering through an upper corner of the frame triggers recording later.
Browning is more versatile and more balanced. It triggers earlier at the cost of somewhat more false triggers, although still far fewer than cheaper cameras produce.
Which approach is right? There is no single answer. Each suits a different job, and your choice depends on what you need. More importantly, once you understand how your camera behaves, you can influence much of its performance through placement alone.
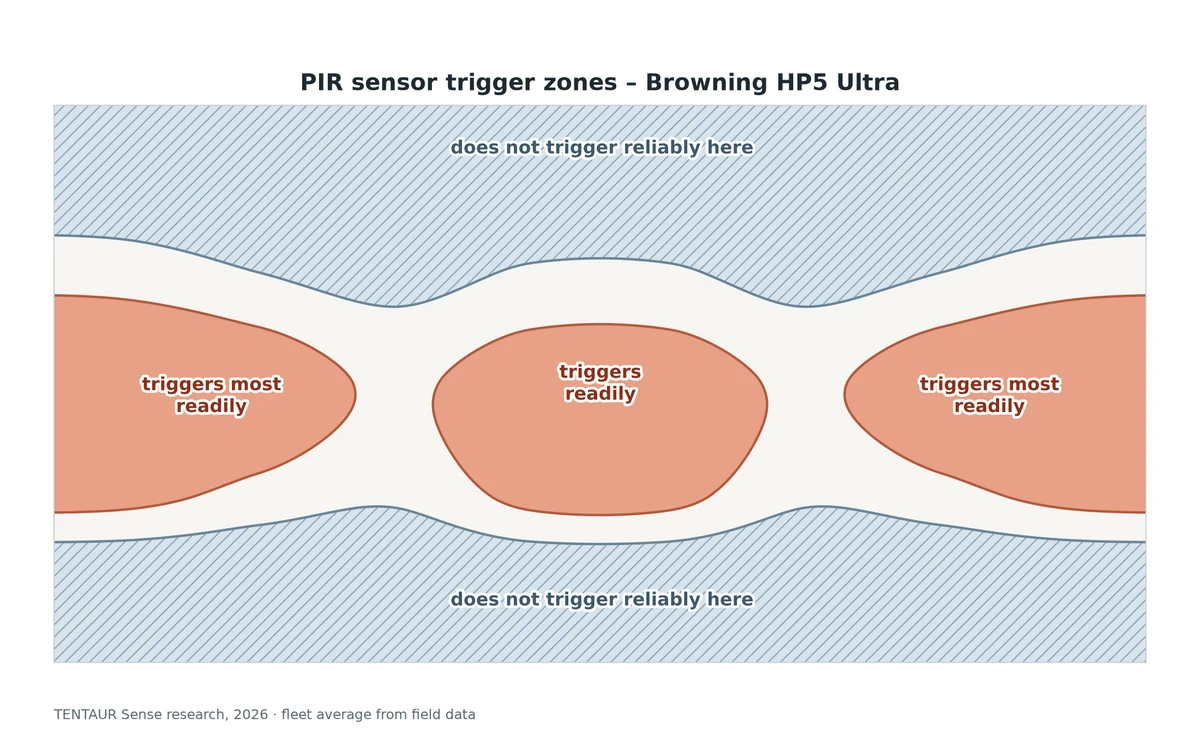
This gives us one simple practical rule: route the expected animal path through a hotspot, not along the top edge of the frame. You can see specific field examples, including a hind entering through the left hotspot and a female bear that the upper part of the frame failed to “see,” in our Browning HP5 Ultra review.
The detection field is not the camera’s field of view
The PIR sensor and the camera lens are two separate optical systems, each with its own viewing angle. Manufacturers almost never align them precisely.
If the detection field is wider than the lens’s field of view, the camera triggers while the animal is still just outside the image. The result is an empty frame or an animal that appears to “run into” the video. Vegetation moving just beyond the edge of the frame can do the same. If the detection field is narrower or offset, you get the more frustrating result: the animal is in the picture, recording never starts, and you never know it was there.
An empty frame does not necessarily mean the camera is broken. The sensor is often reacting correctly to something the lens cannot see.

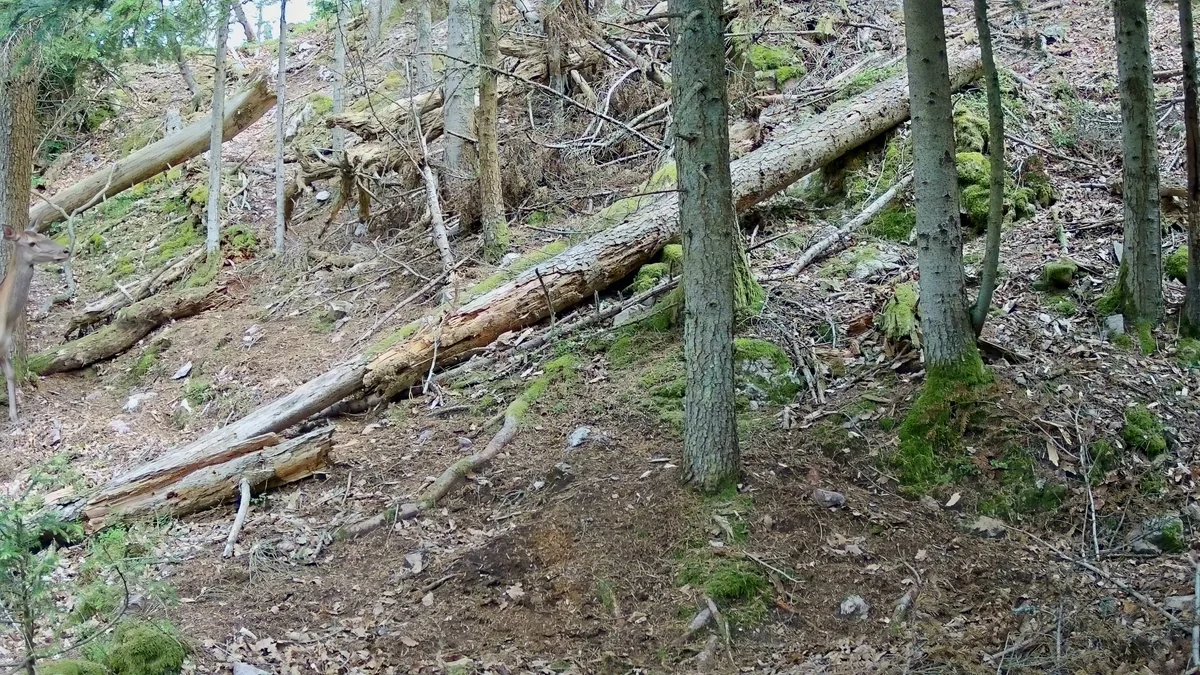
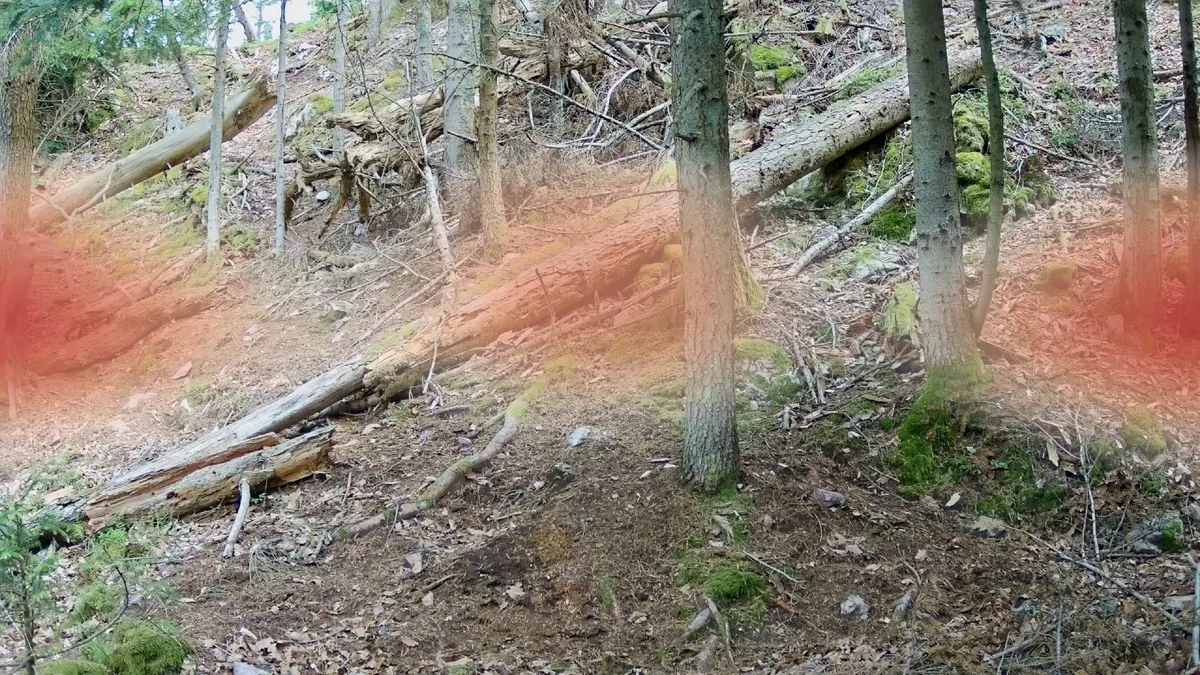
Wider detection also has a useful effect. When the zone reaches the edge of the image, the camera triggers just as the animal steps into the frame. In the first frame of this video, only the hind’s head and neck are visible. The rest of her body is still outside the frame, but recording is already underway.
Direction of movement: why a side crossing works best
When an animal crosses the frame from the side, its thermal image cuts through the zone boundaries one after another, giving the sensor a strong, repeated signal. Diagonal movement produces a weaker signal but still works well. In our experience, an animal walking straight toward the camera is the hardest to detect. Its image slowly grows within a single zone and crosses almost no boundaries, so recording starts late or not at all.
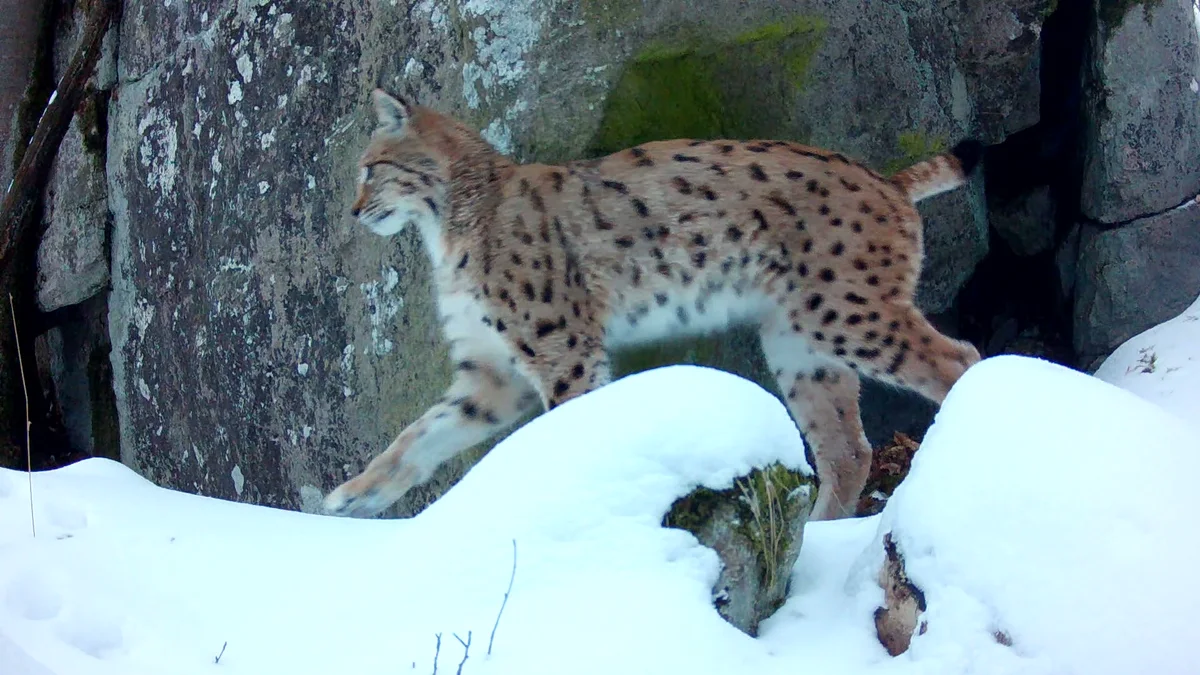
There is one more detail: the outer edge of the field is the least sensitive area. An animal just entering the outermost zone creates less contrast than it does when crossing between zones farther into the frame. A side entry therefore works best slightly inside the edge and at mid-height in the frame.
Speed matters too. The sensor’s electronics are tuned to the normal pace of wildlife. They ignore very slow changes, since otherwise the camera would trigger on cooling rocks. At a sprint, the animal runs up against the camera’s wake-up limit. We have seen this in our own data: two roe deer bucks at full sprint triggered the HP5 Ultra in 0.3 seconds, yet the first buck still appeared only as a motion-blurred smear leaving the frame in the first recorded image. This is not a flaw in one model. It is a physical limit of every PIR sensor.

Distance: where detection is most reliable
PIR behavior changes considerably with the animal’s distance from the camera.
Close (up to about 3 m). The animal fills a large part of the field, and even a small body creates a strong signal. This is not guaranteed, however. A very close animal can fill the fields of view of both elements at once, preventing contrast from forming. Studies using direct observation have recorded missed passes at even one meter. Close works, but directly against the camera does not.
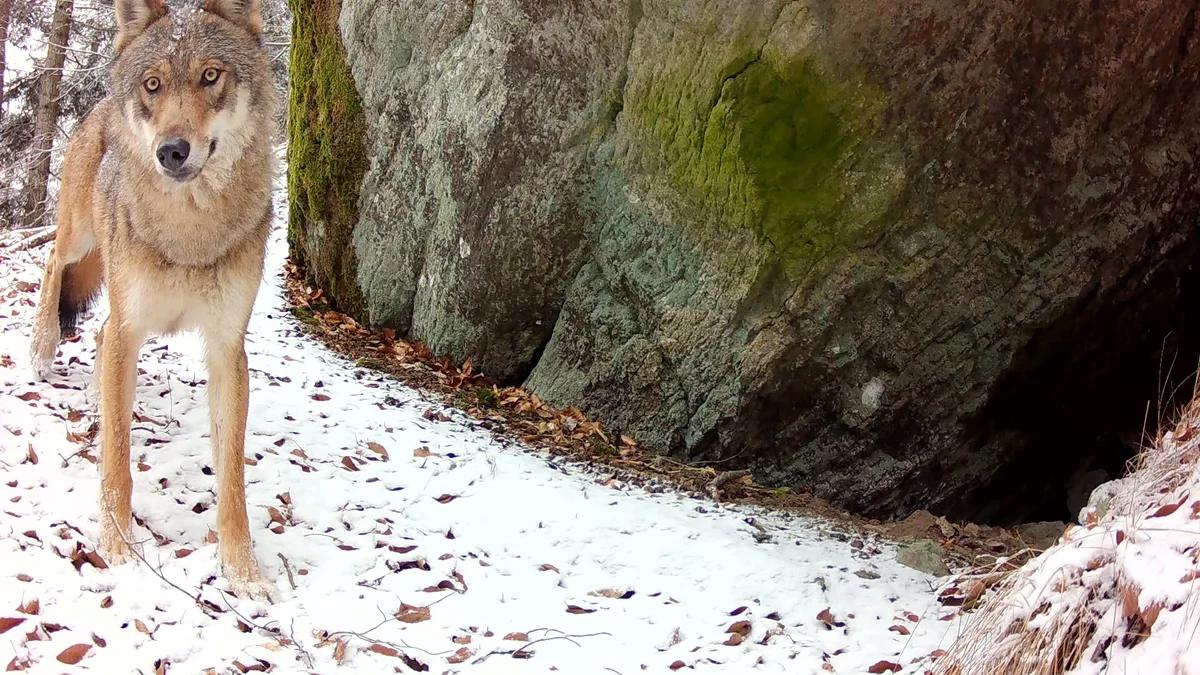
Middle band (about 3 to 10 m). This is the optimum range for most trail cameras: reliable detection, a fast response, and the entire animal in the frame.
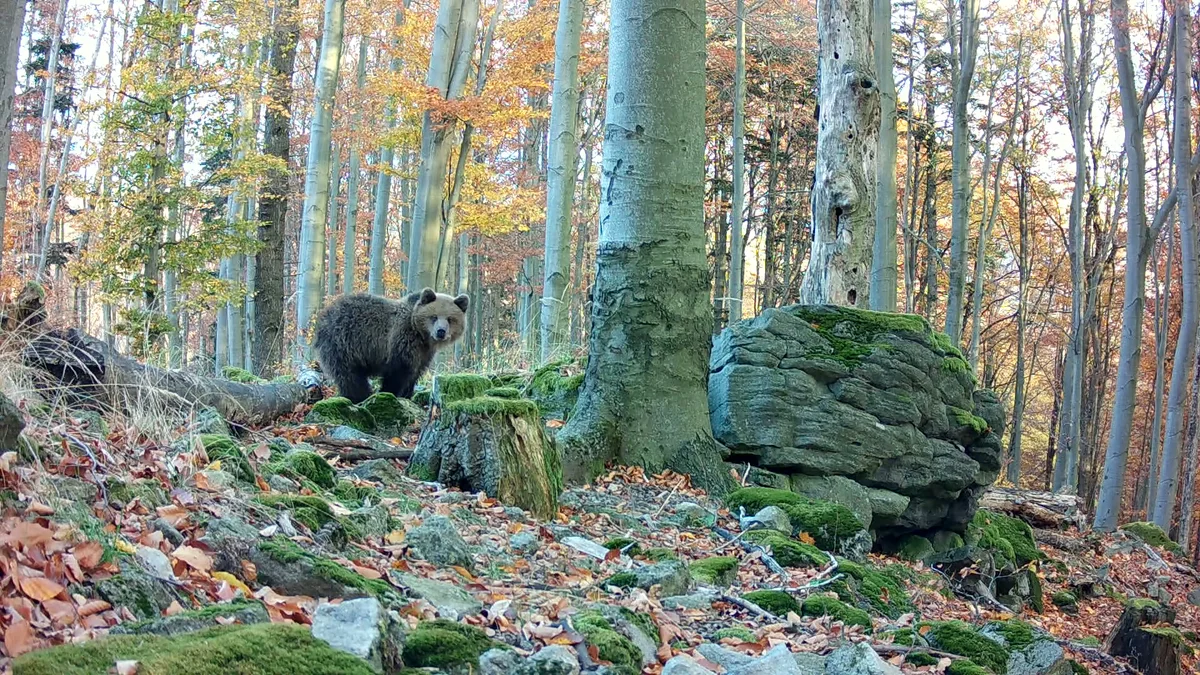
Far (10 to 20 meters and beyond). At this range, the sensor detects only larger bodies, such as red deer and bears, and only when thermal contrast is good. A small animal at that distance blends into the background.

Be skeptical of spec-sheet numbers. Detection range is measured under ideal conditions: a large, warm target in cold weather moving laterally. Without the target and conditions, a single number in meters is practically meaningless. Two units of the same model can also differ noticeably. For dependable triggering, we currently position our cameras so the expected animal path passes 5 to 10 meters away.
Temperature and weather: how sensor behavior changes
PIR works through thermal contrast, so its behavior changes with the weather. Air temperature is not the deciding factor. What matters is the surface temperature of the animal’s coat, the ground, tree trunks, and rocks.
Contrast is strongest in winter or on a clear, cold night. The animal’s body stands out against the cold background, and detection range increases, sometimes surprisingly. Even 20 meters is usually no problem. The opposite happens on a hot summer day. The sun heats the ground and tree trunks to temperatures close to the animal’s surface temperature, the scene blends together thermally, and detection collapses. In controlled tests, the probability of capture at a small temperature difference falls to a fraction of its usual value.
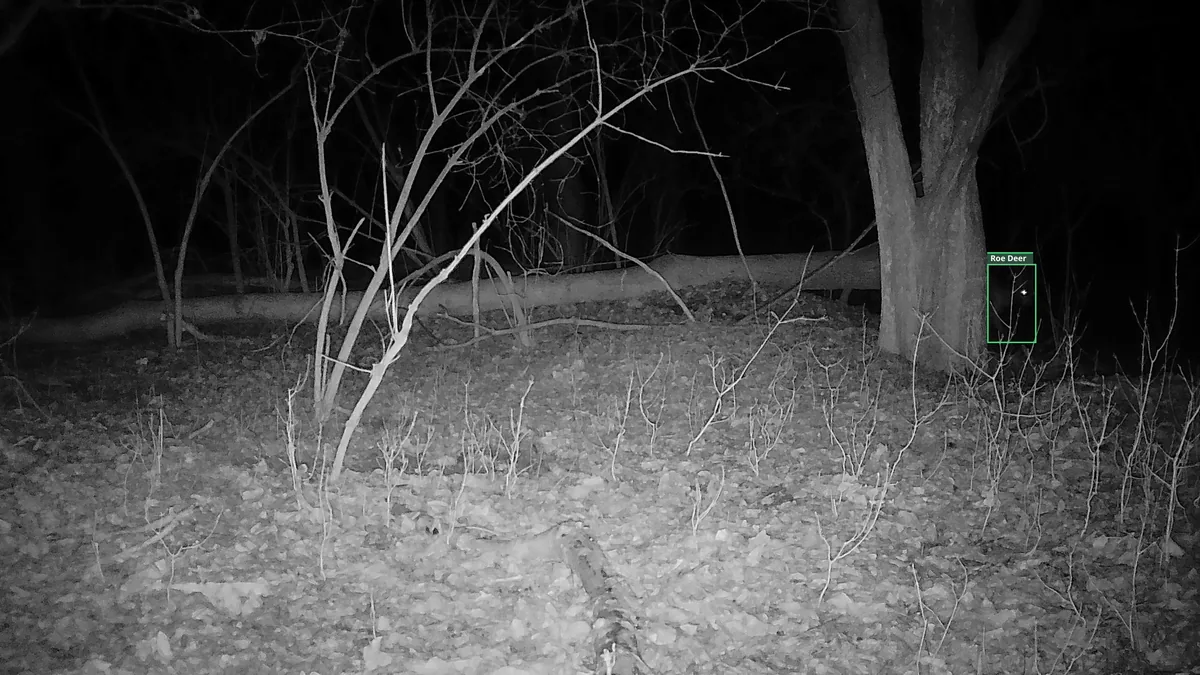
Here is a typical example from our fieldwork: a lynx crossing open ground at 20 meters in winter reliably triggers recording. The same lynx can walk past the camera at a distance of a few meters in the July heat without triggering it.
When interpreting your own data, remember that summer silence on the card does not mean the animals stopped coming. In hot weather, the sensor simply misses some passes. False triggers also decrease, so the apparent calm during a thirty-degree week is partly the result of weaker detection.
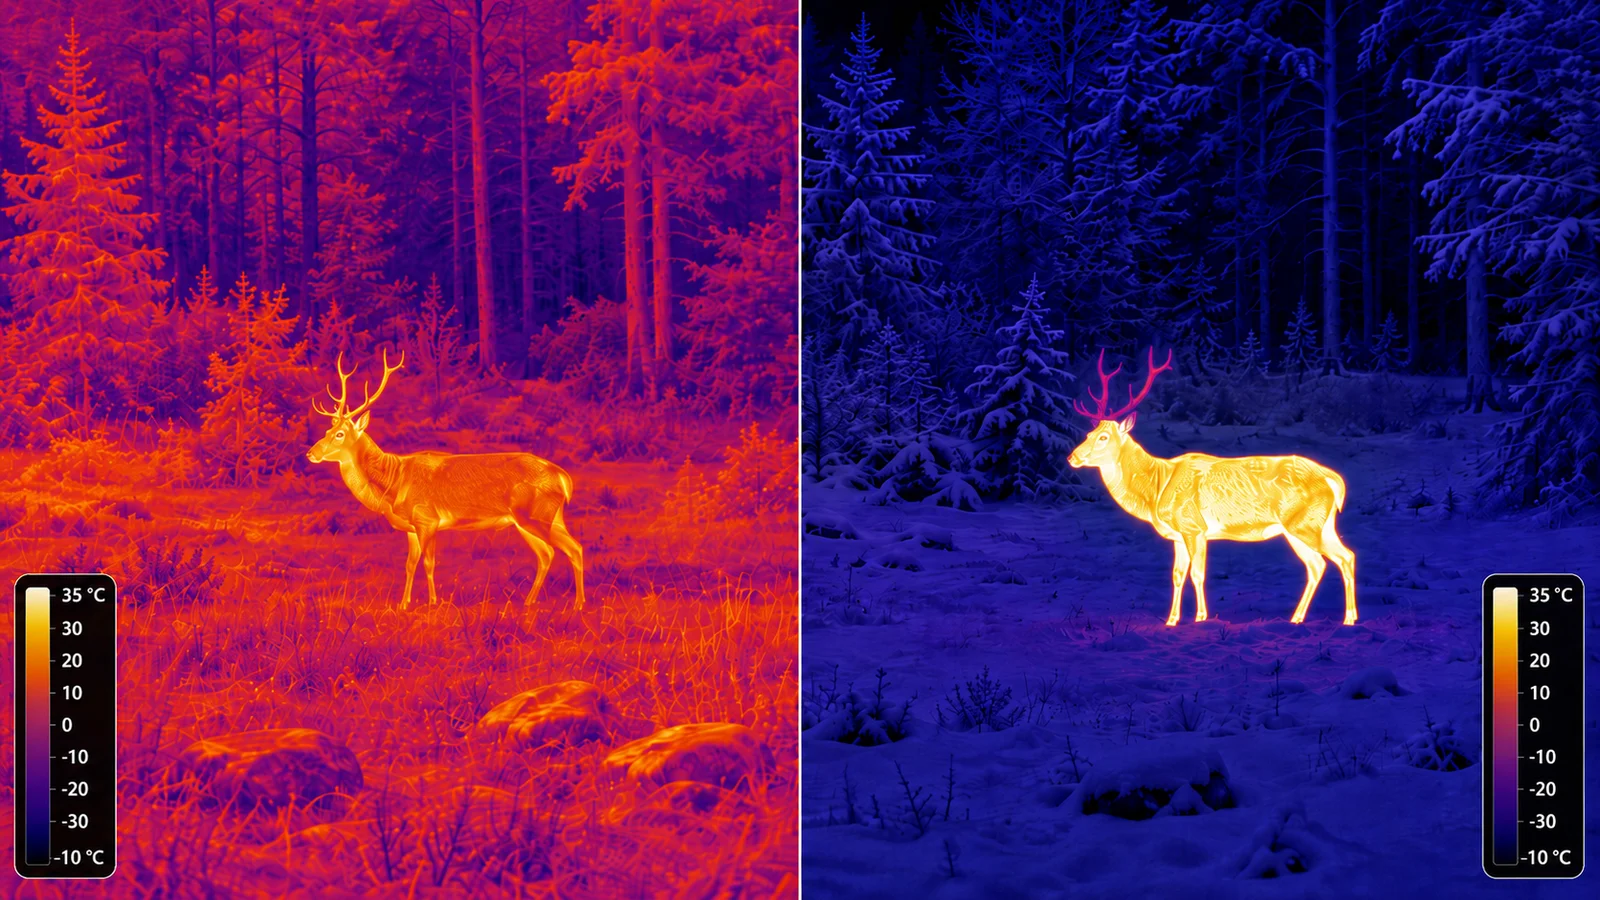
Transition periods are the worst, particularly March days when the sun warms rocks and tree trunks while snow remains in the shade. Air currents at a different temperature from the background, including warm air against a freezing backdrop and cold air against a warm one, can repeatedly trigger the camera and produce hundreds of empty clips a day.
False triggers: where they come from
Once you understand the mechanism, most false triggers are easy to explain. These are the most common causes we see in the field:
- Sun-warmed vegetation moving in the wind. Leaves and stalks are often warmer than the air. When they move across zone boundaries, the sensor sees moving warm objects. Clear the area in front of the camera or lower the sensitivity.
- Rocks and ground cooling after sunset. Surfaces cool unevenly, and most triggers occur within an hour and a half after sunset.
- Direct sunlight entering the sensor window at sunrise or sunset. This is the strongest single source. Aiming the camera north or south helps.
- Insects and cobwebs directly on the window. To the sensor, a fly on the window is an enormous warm object.
- A swaying tree. If the camera moves, the entire zone pattern sweeps across a static scene. Mount the camera on a solid trunk or post.
This is a typical problem scene: an empty frame with no animal. The sun heats the rocks, and air at different temperatures flowing past them creates exactly the contrast that triggers the sensor.
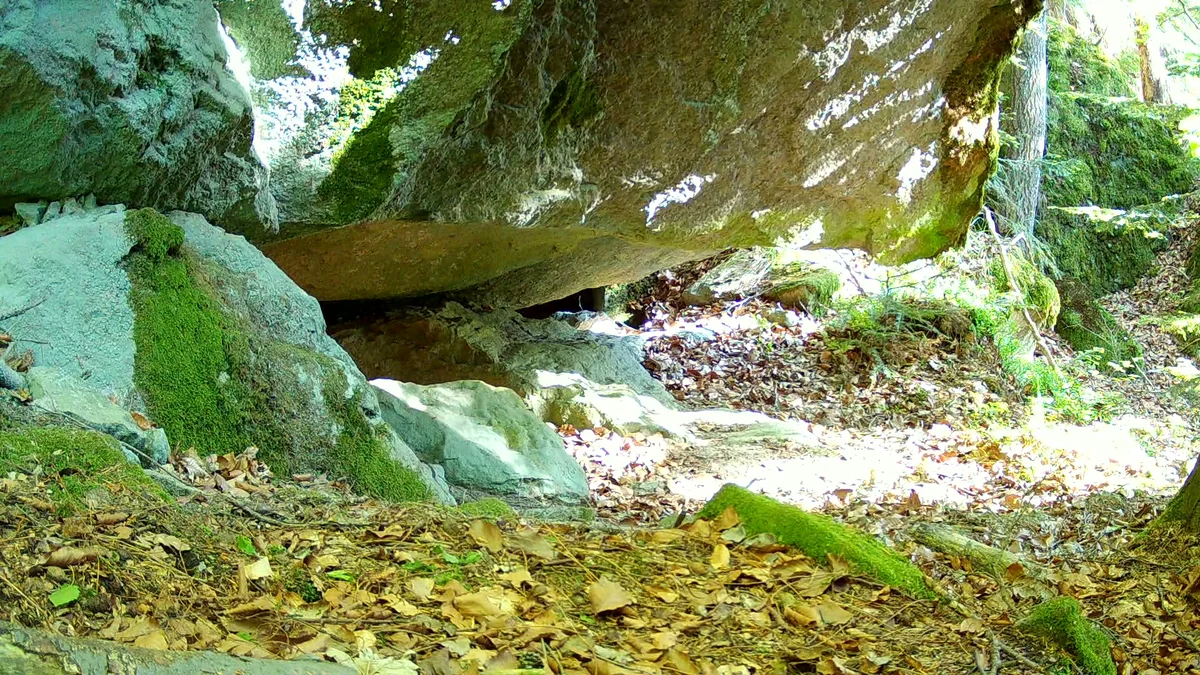
On our HP5 Ultras, empty clips accounted for 21.3% of all videos across the entire test period, including the spring months when false triggers peak. With other cameras in similar conditions, that share often climbs well above 50% in our experience.
How to position a trail camera by its zones
Placement has the greatest practical effect on the result. A high-end camera positioned so animals never cross its zones will trigger late or not at all. Even a cheaper model can work surprisingly well when aimed correctly.
These are the rules we currently follow:
- 5 to 10 meters from the expected path. Sensitivity decreases with distance, and movement farther away often fails to create enough contrast. For large animals, choose a distance closer to the upper end of the range; for small animals, use the lower end.
- Perpendicular to the direction of travel. Ideally, the animal should move sideways across the frame. Good cameras also handle diagonal crossings, but every camera struggles with a head-on approach. Never aim the camera straight down the trail.
- Entry from the side, at mid to lower frame height. To start recording as the animal enters, its path should cross the left or right edge slightly below the midpoint of the frame. Movement along the very bottom or top often passes outside the active zones.
- Do not block the edge zones. A tree or rock directly at the edge of the frame can cover half of the outermost zone and prevent the necessary contrast from forming. These compositions may look better, but the camera will not trigger until the animal reaches the center.
- Account for the slope. An animal moving across a slope cuts through the horizontal bands at an angle and may pass below some of them. If the terrain drops sharply, tilt the camera slightly so the bands follow the slope.
- Aim slightly downward. This reduces the effect of the sky and treetops while keeping the zones where animals move. Never aim at the horizon or sky. The sky has a completely different thermal signature, and treetops moving in the wind are a reliable source of empty clips.
- Use a solid mount. Choose a trunk at least 15 cm across or use a post. A thin tree sways in the wind, taking the entire zone pattern with it.
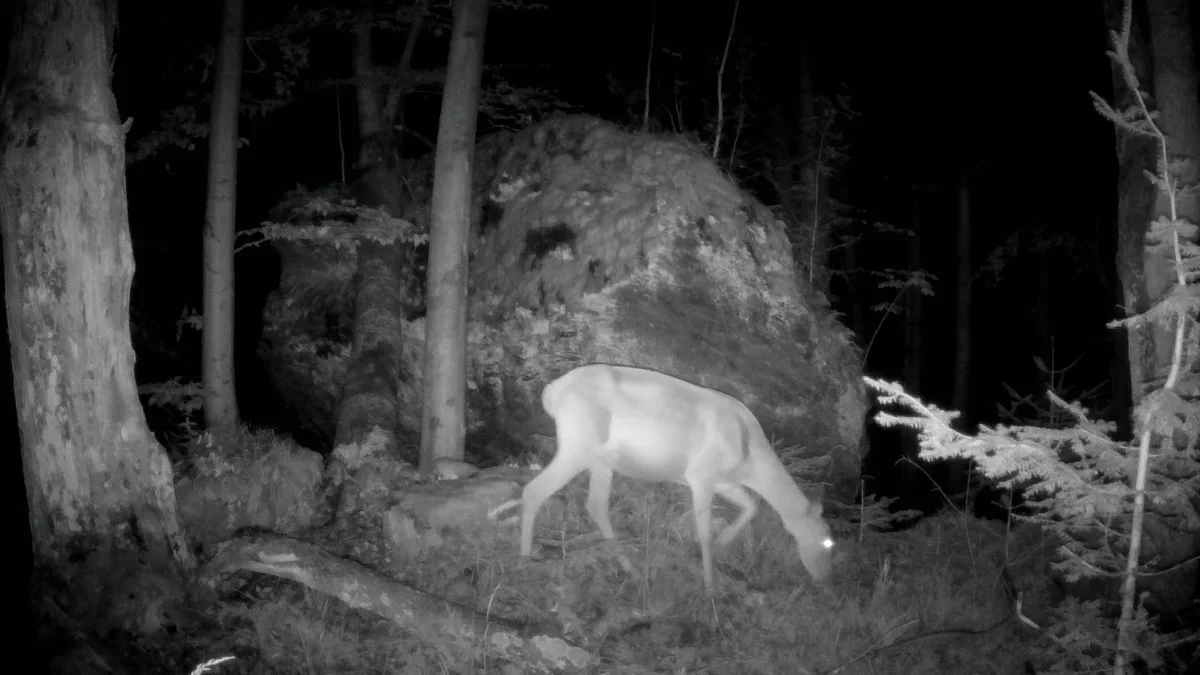
Here is a classic example of poor placement. Trees in the left part of the frame blocked the left trigger zone. The hind did not trigger recording until she reached the central zone, so she is already in the middle of the frame when the video begins.
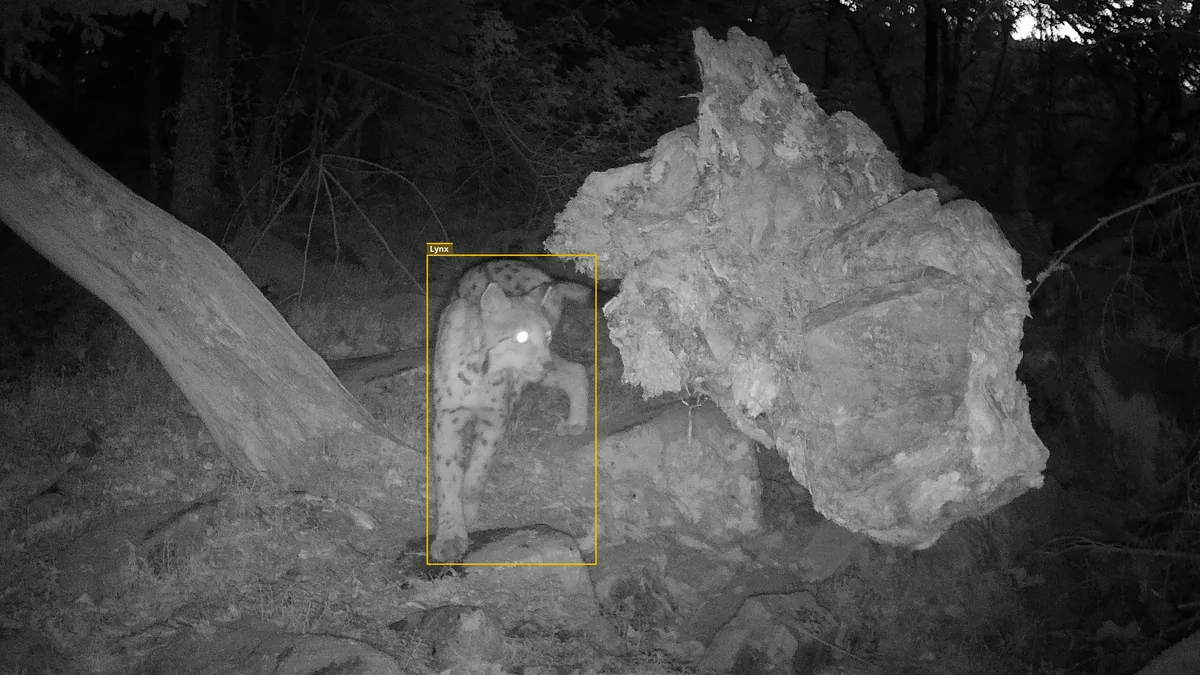
The same rule applies to other obstacles. This lynx approached the uprooted tree from behind fallen trunks, so the sensor could not detect it sooner. Recording started only when the lynx appeared in the center of the frame. An obstacle within the frame or just beyond its edge works like a covered zone.
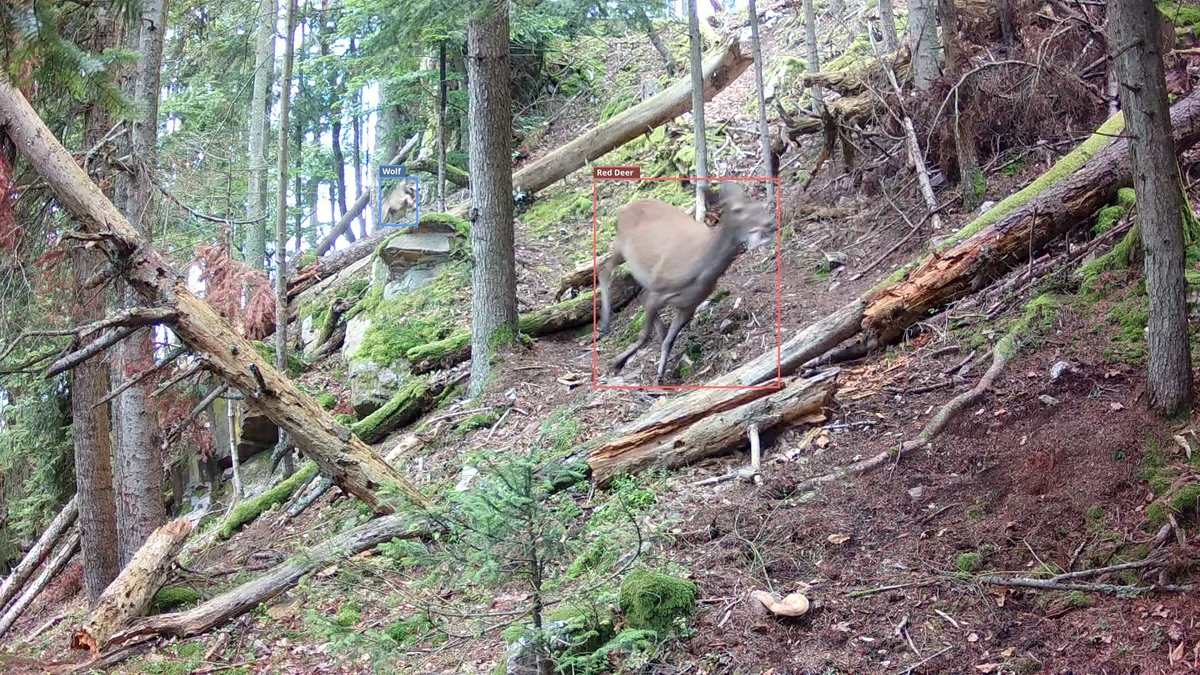
Sometimes this is a deliberate trade-off. We composed this shot around the trees on the left because we liked them at this location. The trade-off was a practically dead left trigger zone: the hind did not trigger recording until she was past the center of the frame. The wolf following her is still visible above her near the rocks. Because the wolf was almost certainly following her exact tracks, we know the hind also entered through the blocked left side. In the field, you sometimes have to choose between a better-looking composition and the most reliable triggering.
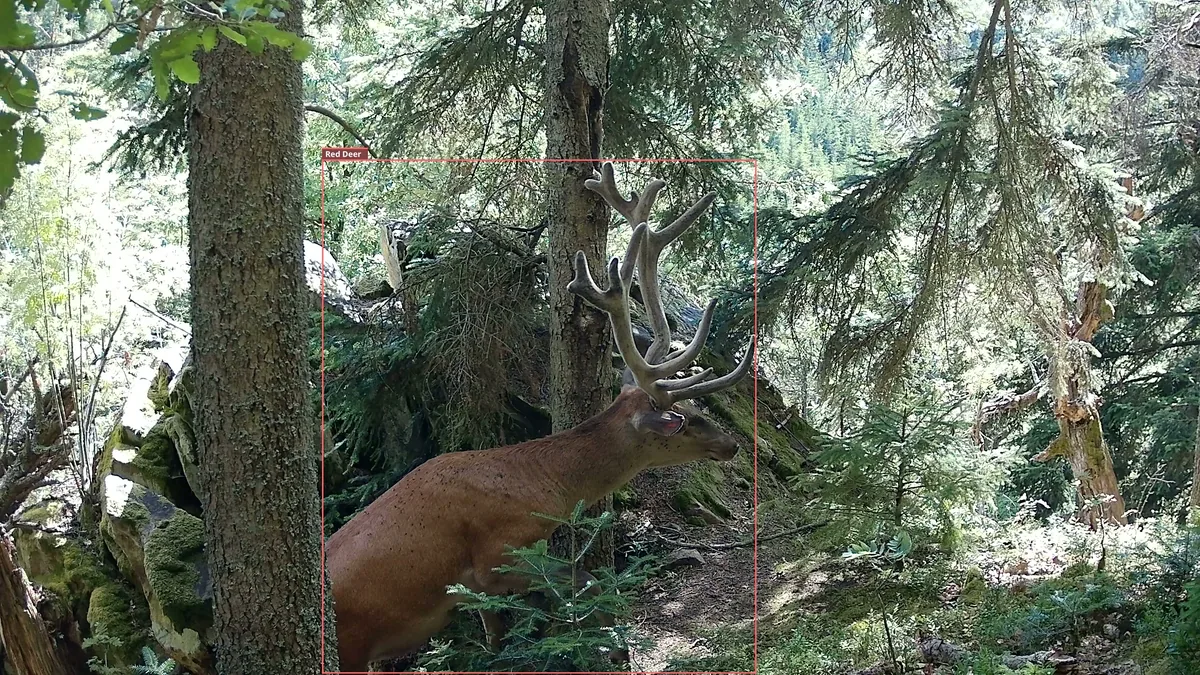
Here is how terrain affects triggering in practice. A red deer stag whose route passed directly through the right hotspot triggered recording immediately. In the first frame, he is only just entering the picture.
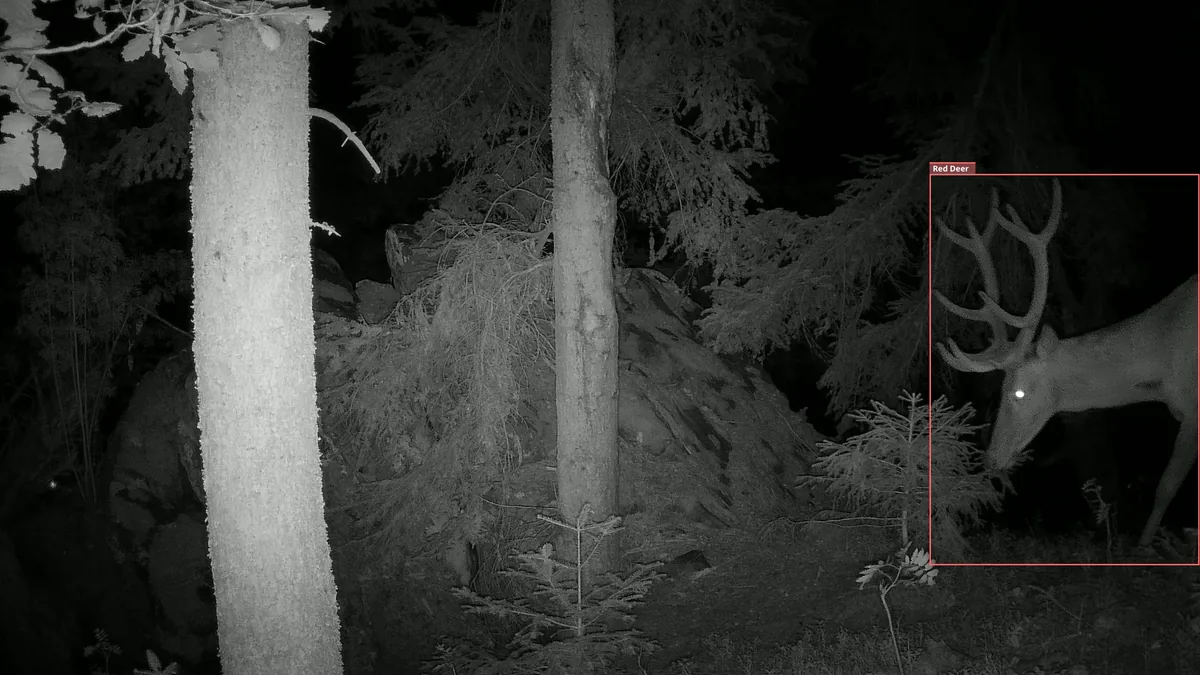
A stag approaching from the opposite side, where the terrain slopes downward, passed below the left hotspot. The camera reacted only when he reached the middle of the frame.
Adjust the sensor sensitivity with the seasons. You can set it high in cold, calm weather, but lower it in hot weather, direct sunlight, and areas with vegetation.
Conclusion
Understanding trigger zones changes how you use trail cameras. Late triggers, empty videos, false alarms, and different results from two cameras at the same location all start to make sense.
A trail camera may be automatic, but it remains a physical instrument with clear limits. Once you know where and how it “sees” motion, you can position it to capture wildlife reliably. The trigger-zone maps we reconstructed from field data using our TENTAUR Sense software are included in the Browning HP5 Ultra review, along with example clips. We will share more about TENTAUR Sense soon.
Frequently asked questions
Why does my trail camera trigger when nothing is in the frame?
The most common causes are sun-warmed vegetation moving in the wind, surfaces cooling after sunset, direct sunlight entering the sensor window, insects on the window, and the camera moving on a thin tree. An animal may also have triggered the recording just outside the lens’s field of view because the detection field is usually wider than the image. An empty frame does not mean the sensor is broken.
Why did the camera miss an animal that walked right past it?
The animal may have passed through an area where that model has no trigger zone, typically the top edge or very bottom of the frame. It may also have approached the camera head-on without producing lateral movement, or the thermal contrast may have been too low on a hot summer day. A motionless animal will not trigger the sensor at all.
What is the real detection range of a trail camera?
The spec-sheet figure applies to a large, warm target moving laterally in cold weather. In ordinary terrain, the reliable range is shorter and changes with the weather and the size of the animal. For dependable triggering, position the camera 5 to 10 meters from the expected path.